
How To Assign a Purchased HiveLogger QR Tag to a Hive
Purchased a weather-resistant QR tag from our store? Follow these simple steps to link your new tag to an existing hive in the app so you can start scanning and logging right away.
Prefer Video? Watch the full walkthrough on YouTube.
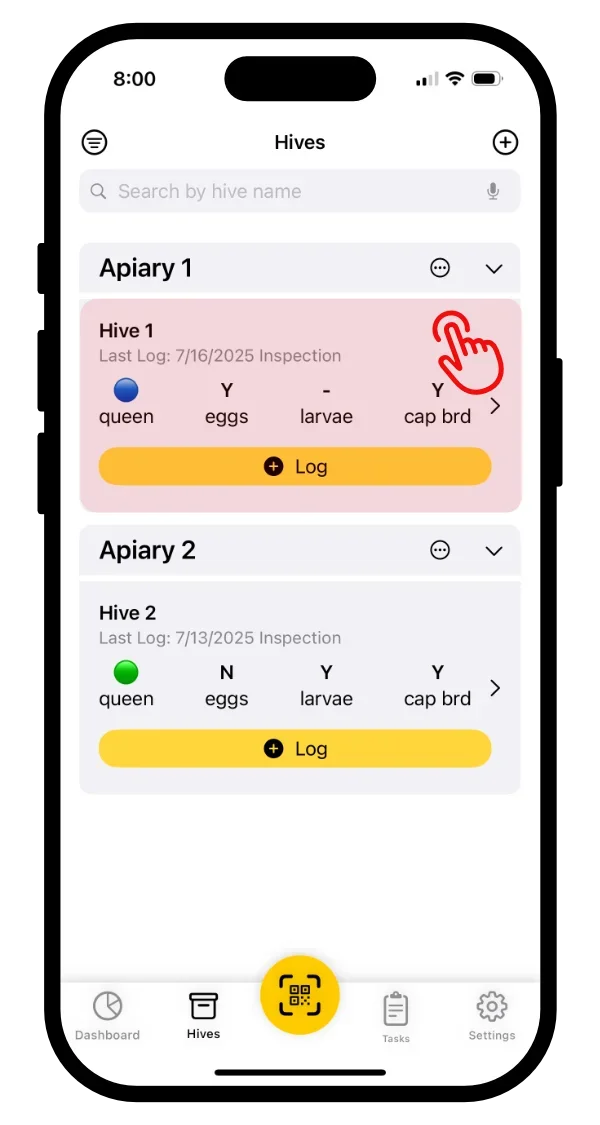
Open the hive you want to tag
Go to the Hives tab and tap the hive you want to assign the QR tag to.
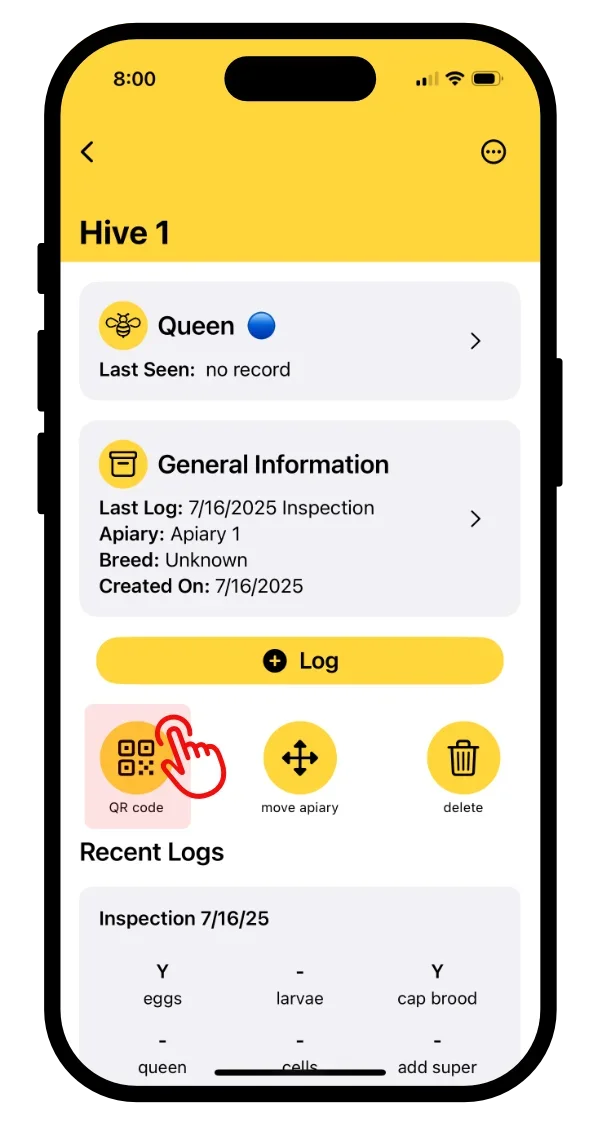
Tap the QR code icon
On the hive detail screen, tap the QR code icon.
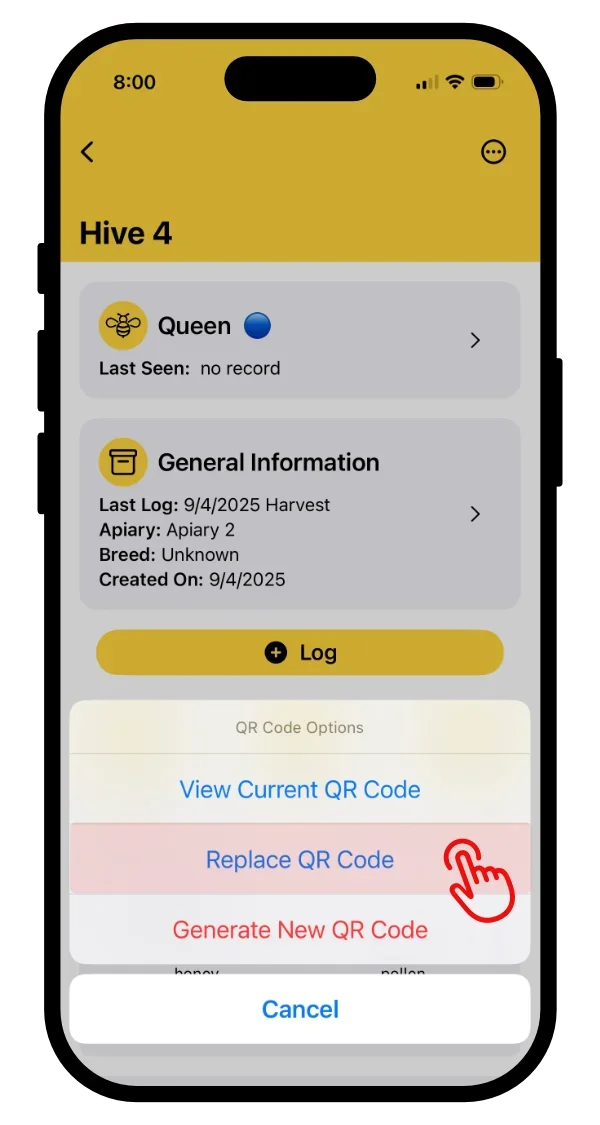
Select "Replace QR Code"
From the menu that appears, tap Replace QR Code. This is the correct option whether you're assigning a tag for the first time or swapping an existing one.
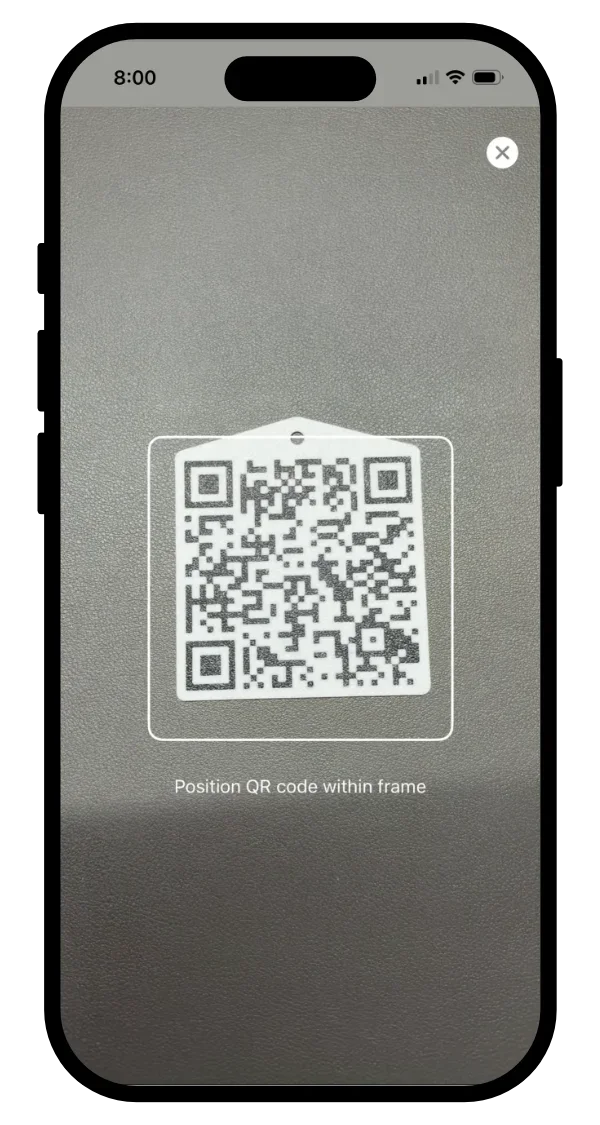
Scan the QR tag
Point your camera at the physical QR tag. HiveLogger will scan it automatically.
If the camera does not open, check that HiveLogger has camera permissions enabled in your device's system settings.
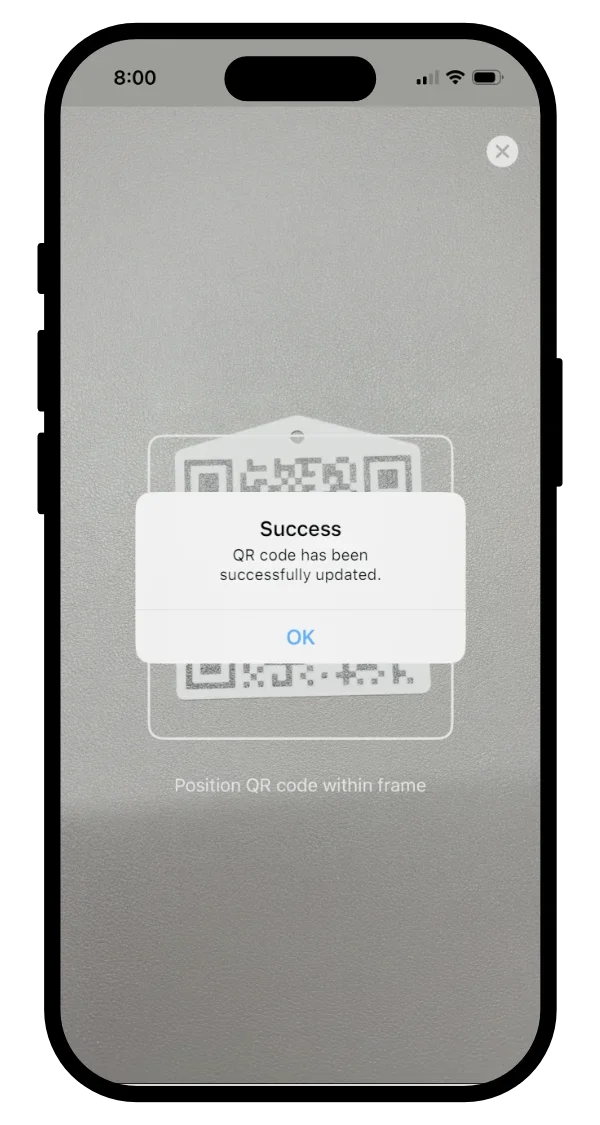
Confirm the assignment
A confirmation screen appears once the tag is successfully linked to your hive. You're all set. Scan the tag anytime to open that hive's log directly.
Need more QR tags?
Stock up on HiveLogger's weather-resistant QR tags and number tags, built to handle the elements season after season.
Shop QR Hive TagsHave another question? Visit our FAQ.
HiveLogger was built by a beekeeper, for beekeepers. Our mission is to simplify hive management so you can focus on your colonies, not remembering where you set a log book or the last time you inspected a hive.